
Refreshing your kitchen doesn’t always require a full remodel. Painting IKEA kitchen cabinets is an easy and affordable way to give your space a new and vibrant look. With the right DIY techniques, tools, and color choices, you can transform old cabinets into a stylish centerpiece.
IKEA cabinets are especially popular because of their modern design, affordability, and adaptability. Whether you want a sleek, glossy finish or a cozy, matte vibe, this guide provides step-by-step instructions, expert tips, and customization ideas to make your kitchen feel brand new.
Why Choose IKEA Kitchen Cabinets?
IKEA cabinets are a favorite among homeowners and DIY enthusiasts because they are affordable, versatile, and easy to customize. Compared to traditional custom cabinets, IKEA options offer a modern look at a fraction of the price.
Their simple design makes them perfect for painting, adding hardware, or installing custom doors. Many users report that with a little creativity, IKEA cabinets can look high-end and stylish, making them a smart choice for any kitchen makeover.
Step-by-Step Guide to Painting IKEA Cabinets
Painting cabinets may seem intimidating, but following these steps ensures a smooth, long-lasting finish.
1. Remove Doors, Drawers, and Handles
Start by carefully removing all cabinet doors, drawers, and hardware. Label each piece and note its original placement. This makes reassembly easier and ensures a clean, organized workflow.
2. Clean the Cabinets
Use a grease remover or mild cleaner to eliminate dirt, oil, and dust. A clean surface allows paint to adhere better and prevents imperfections.
3. Sand the Surfaces
Lightly sand all cabinet pieces with medium-grit sandpaper. Sanding helps the primer stick and creates a smooth surface for painting. Remove any dust with a clean cloth.
4. Apply Primer
Apply a high-quality primer to all cabinet surfaces. Primer ensures better paint adhesion and helps achieve a long-lasting, professional finish.
5. Paint the Cabinets
Use a foam roller or high-quality brush to apply paint in thin, even coats. Allow each coat to dry before applying the next. Popular finishes include glossy, satin, or matte, depending on your kitchen style.
6. Seal and Let Dry
After painting, apply a protective sealant to maintain durability and shine. Let cabinets dry completely before reassembling. This ensures a smooth, long-lasting finish.
See Also: IKEA Rotating Bookshelf: Best Rotating Bookshelf Ideas 2026
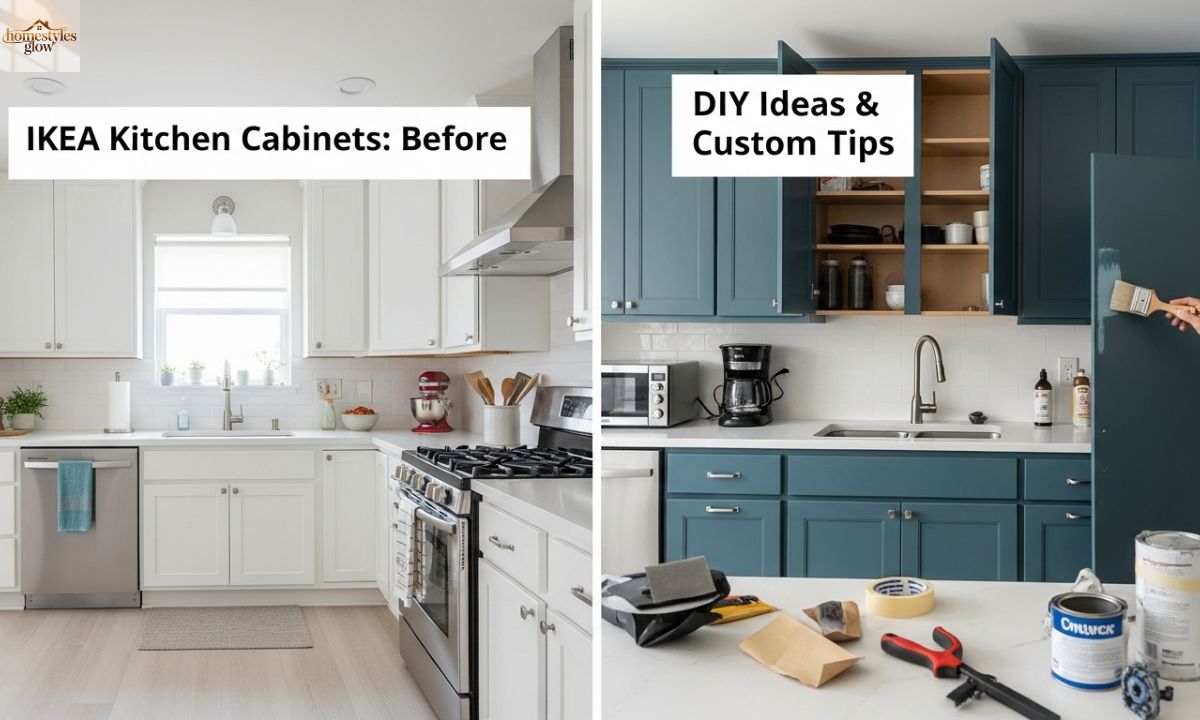
What to Expect Before and After Painting
Painting IKEA cabinets transforms your kitchen dramatically. Before painting, cabinets may look dull, outdated, or worn. After, they appear fresh, bright, and stylish. You can experiment with neutral tones for a classic look or bold colors to create a vibrant focal point. Choosing the right paint finish can make your kitchen feel cozy, modern, or elegant, depending on your design goals.
Best Ideas for IKEA Kitchen Cabinet Design
- Use glossy paint for a shiny, modern look
- Add new handles, knobs, or metal trims to enhance style
- Incorporate under-cabinet lighting for a warm ambiance
- Mix two-tone cabinets (upper and lower) for visual interest
- Customize cabinets with glass panels to display dishware
Custom Doors for IKEA Cabinets
Replacing standard doors with custom doors is a simple way to upgrade IKEA cabinets. Custom doors allow you to match your kitchen’s theme, add unique textures, or introduce decorative panels. Many brands offer affordable options that fit IKEA’s dimensions, giving your kitchen a cozy and high-end look without breaking the budget.
Are IKEA Kitchen Cabinets Worth It?
Yes! IKEA kitchen cabinets are widely praised for their affordability, modern design, and DIY adaptability. Painting and customizing them increases their value and aesthetic appeal. Many homeowners find that these cabinets offer a cost-effective alternative to expensive custom cabinetry, while still allowing complete control over style and finish.
Best Time to Buy IKEA Kitchen Cabinets
To get the best deals, watch for seasonal sales, special promotions, or clearance events. Planning your purchase around these times can save you money and allow you to invest in high-quality paint and custom finishes for your kitchen transformation.
Final Thoughts
Painting IKEA kitchen cabinets is a smart, stylish, and affordable DIY project. By following the step-by-step process, selecting the right colors, and considering custom doors or hardware, you can completely refresh your kitchen’s look. Whether you prefer a modern, glossy finish or a warm, cozy aesthetic, IKEA cabinets provide the flexibility to match your vision. With creativity and care, your DIY-painted cabinets can look professional and last for years, making your kitchen both beautiful and functional.
FAQs
1. Can I paint IKEA cabinets myself?
Yes! With the right tools, primer, and paint, anyone can achieve a professional-looking finish.
2. What type of paint is best for IKEA cabinets?
Use high-quality enamel or acrylic paint for durability and a smooth finish.
3. Should I remove cabinet doors before painting?
Absolutely. Removing doors, drawers, and hardware ensures even coverage and easier application.
4. How many coats of paint should I apply?
Apply 2–3 thin coats for a smooth, durable finish. Allow each coat to dry completely.